25 Contoh Procedure Text Singkat Berbagai Macam Tema | Bahasa Inggris Kelas 9
Bingung ketika diberi tugas membuat teks prosedur bahasa Inggris? Yuk, simak macam-macam contoh procedure text singkat yang ada di sekitar kita dalam artikel Bahasa Inggris kelas 9 berikut ini!
—
Saat kamu sakit, pasti kamu akan dianjurkan untuk mengonsumsi obat oleh dokter. Nah, pernahkah kamu menyadari, jika di setiap bungkus obat terdapat prosedur tentang bagaimana cara menggunakan obat tersebut? Kamu tahu nggak sih kalau itu adalah salah satu contoh teks prosedur yang ada di sekitar kita?
Dalam materi Bahasa Indonesia kelas 7, kamu sudah belajar mengenai teks prosedur, ya. Kalau kamu lupa, kamu bisa baca di artikel berjudul, “Pahami Pengertian Teks Prosedur, Ciri-Ciri, Struktur, dan Contohnya, Yuk!“.
Nah, dalam bahasa Inggris juga ada materi teks prosedur, yaitu procedure text. Materinya juga sudah lengkap dibahas di blog Ruangguru, loh! Kamu bisa baca di artikel: Pengertian Procedure Text, Struktur, Jenis-Jenis, dan Contohnya.
Kali ini, kita akan membahas macam-macam contoh teks prosedur bahasa Inggris dalam berbagai tema. Yuk, simak!
Pengertian Procedure Text
What is procedure text? (Apa itu teks prosedur?). Procedure text is a text that explains or helps us how to make or use something. Apabila diartikan ke dalam bahasa Indonesia, procedure text adalah sebuah teks yang memberikan instruksi mengenai cara untuk membuat atau melakukan sesuatu.
Baca Juga: Mengenal Report Text: Pengertian, Struktur, Tujuan & Contohnya
Tujuan Procedure Text
The purpose of procedure text is to explain how something can be done such as directions, recipes, instruction manual, and itineraries. Dengan kata lain, tujuan procedure text adalah menjelaskan bagaimana sesuatu dibuat atau dilakukan dengan langkah-langkah yang berurutan.
Struktur Procedure Text
Nah, sebelum membahas contoh-contoh procedure text, kita bahas secara singkat strukturnya dulu, ya. Secara garis besar, structure of procedure text tersusun atas tiga bagian, yaitu goal, materials, dan steps. Berikut masing-masing penjelasannya!
1. Goal
Goal merupakan tujuan penulis dalam membuat procedure text.
2. Materials
Bagian ini menjelaskan tentang bahan-bahan atau alat yang diperlukan untuk membuat sesuatu atau untuk mencapai goal yang diinginkan.
3. Steps
Terakhir, step merupakan langkah atau cara yang harus kita ikuti dari awal hingga akhir dalam membuat sesuatu.
Baca Juga: Cara Mengungkapkan Expression of Agreement and Disagreement
Contoh Procedure Text
Alright, sekarang kamu sudah mengetahui pengertian dan struktur procedure text, ya. Next, kita perhatikan beberapa contoh procedure text dalam bahasa Inggris di bawah ini, yuk!
1. Contoh Procedure Text Medical Prescription
Medical Prescription
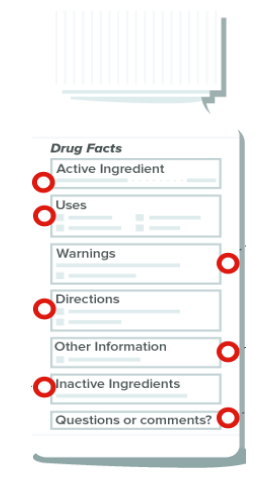
Medical prescription (Sumber: tylenol.ca)
Pada gambar di atas, terdapat judul yang terletak paling atas, yaitu Drug Facts yang mempunyai arti “informasi obat”. Di sana, kita dapat menemukan apa saja yang biasanya terpampang pada label obat, seperti Active and Inactive Ingredients, Warnings, Directions, Other Information, dan Questions or Comments.
Sekarang, mari kita bedah satu per satu bagian-bagian yang ada dalam obat tersebut!
Active and Inactive Ingredients
Bagian ini mempunyai arti “zat aktif” dan “zat inaktif”. Apa itu? Oke, yang dimaksud dengan zat atau kandungan aktif, yaitu senyawa kimia yang berfungsi untuk menyembuhkan gejala-gejala penyakit, sesuai dengan tujuan pembuatan obat tersebut. Biasanya, zat atau kandungan aktif ini selalu ada di bagian atas label.
Sedangkan, zat atau kandungan inaktif adalah segala sesuatu yang terkandung di dalam obat, tetapi nggak dimaksudkan untuk menyembuhkan gejala. Biasanya, zat atau kandungan inaktif ini selalu ada di bagian bawah label.
Uses
Bagian ini mempunyai arti “penggunaan atau indikasi”. Ini adalah informasi mengenai jenis gejala penyakit yang bisa diatasi oleh obat tersebut, misalnya meringankan sakit kepala atau hidung tersumbat.
Warnings
Bagian ini mempunyai arti “peringatan”. Kata ini sering tercantum pada kemasan atau label obat-obat tertentu untuk memberi peringatan, misalnya tentang sifat obat ataupun pemakaiannya kepada si pemakai atau konsumen obat tersebut dan efek samping yang bisa ditimbulkan obat.
Directions
Bagian ini bukan berarti “arah” ya, melainkan “petunjuk” pada kemasan obat. Petunjuk ini berisi berapa takaran dan berapa sering obat harus digunakan.
Other Information
Bagian ini mempunyai arti “informasi lain” atau di luar hal-hal sebelumnya. Biasanya tentang bagaimana sebaiknya menyimpan obat tersebut. Misalnya, obat harus disimpan di tempat kering, tidak lembab, atau jauh dari sinar matahari.
Questions and Comments
Bagian ini mempunyai arti “pertanyaan dan komentar”. Bagian ini memuat info tentang nomor telepon, surel, atau alamat produsen pembuat obat atau layanan konsumen.
Baca Juga: Contoh Kalimat If Clause pada Conditional Sentence
2. Contoh Procedure Text How to Make Coffee
How to Make Simple Creamy Coffee Milk
Ingredients:
- 1 teaspoon of coffee powder
- 1½ spoons of full cream milk
- ½ teaspoon of sugar (you can skip this because full cream milk is fairly sweet)
- A cup of water
Utensils that we need:
- A teaspoon
- A cup
Steps:
- Take the coffee powder, sugar, and full cream milk in the cup.
- Whisk the mixture rigorously by using the spoon until its color becomes light brown.
- Heat a cup of water in pan and wait until it’s boiled.
- After that, pour the boiled water into the cup that has the mixture of coffee cream in it.
- Then, stir it well by the spoon.
- Once done, a cup of hot coffee milk is ready to be served.
Dari teks prosedur di atas, goal-nya bisa dilihat dari judul, yaitu How to Make Simple Creamy Coffee Milk. Jadi, penulis ingin memberikan resep cara membuat kopi susu yang creamy. Kemudian, bagian materials bisa dilihat dari ingredients dan utensils yang dilampirkan. Terakhir, langkah-langkah membuat kopi susu juga sudah dijelaskan secara berurut di bagian steps.
3. Contoh Procedure Text How to Make Salad
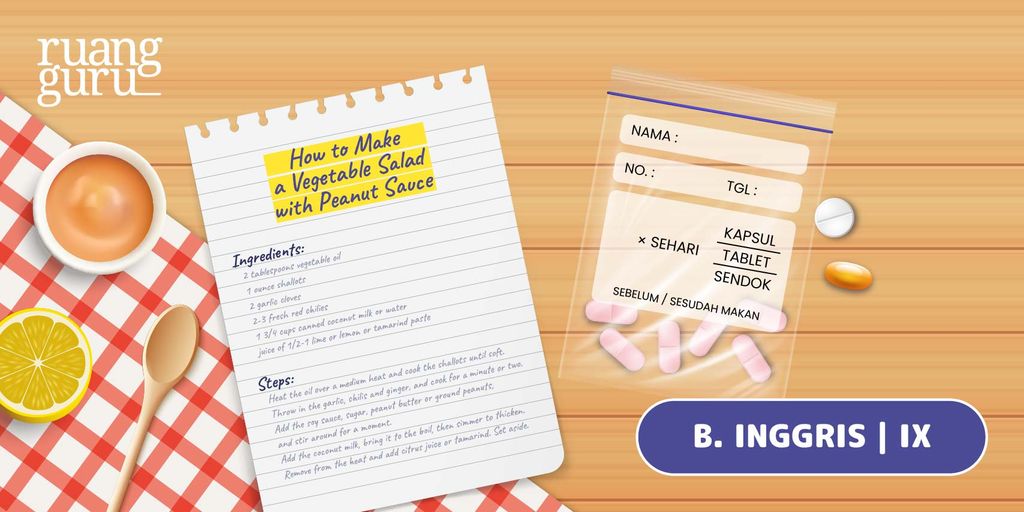
How to Make a Vegetable Salad with Peanut Sauce
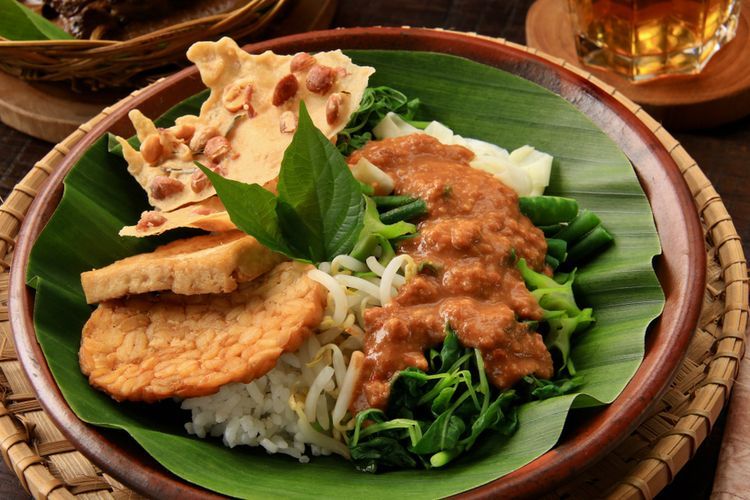
Gambar vegetable salad with peanut sauce. (Sumber: kompas.com)
Ingredients:
- 2 potatoes – cut into quarters & boiled
- 2 eggs – boiled and cut into quarters
- Bean sprouts – blanched
- Long beans – cut into 2 inch long, blanched
- Firm tofu – pan fried/baked & cut into cubes
- Tempe – cut into slices & pan fried/baked
- Spinach – blanched & roughly chopped
- Cabbage – blanched and thinly sliced
- Cucumber – cut into cubes
- Chayote – boiled
Ingredients for Sauce:
- 100 gram fried peanut
- 1 clove garlic
- 1 teaspoon shrimp paste
- 2 red chili peppers
- 1 teaspoon brown sugar
- 1/2 teaspoon tamarind pulp
- 1/2 teaspoon of lime juice
- Salt to taste
- 1 cup hot water, depending on desired thickness
Utensils that we need:
- Pot
- Colander
- Mortar and Pestle
- Serving dish
- Slotted spoon
Steps:
- Place fried peanut, garlic, brown sugar, chilies, and shrimp paste in a mortar. Grind with pestle until everything is well mixed. Remove into a mixing bowl.
- Add tamarind juice, lime juice, and half cup of water. Stir well and add more water to get the consistency of peanut sauce to your liking.
- Boil separately the cabbage, long beans, spinach and bean sprouts, potato and egg, then put aside.
- Blanch the rest of the vegetable and egg in boiling water and remove using a slotted spoon.
- Place a portion of each salad ingredient into a serving plate/bowl. Serve the peanut sauce and mix well. It can be served both warm or cool.
(Sumber: foodrepublic.com)
Dari procedure text di atas, kita bisa mengetahui bahwa goal teks tersebut adalah “How to Make a Vegetable Salad with Peanut Sauce” atau cara untuk membuat pecel. Lalu, materials atau bahan yang dibutuhkan dalam teks tersebut berada pada bagian “Ingredients”, “Ingredients for Sauce”, dan “Utensils that we need”. Terakhir, steps dijelaskan pada bagian “Steps” yang terdiri atas 5 langkah.
Baca Juga: Rumus & Contoh Kalimat Perfect Tense Passive Form
4. Contoh Procedure Text How to Make Pancake
How to Make Pancakes
Ingredients:
- 1 cup all purpose flour
- An egg
- 2 teaspoons baking powder
- 1/2 teaspoon salt
- Unsalted butter/vegetable oil
- 1 cup milk
- 2 tablespoons sugar
- For toppings: use maple syrup, honey, chocolate syrup or jam
Steps:
- Take a large bowl and mix flour, sugar, baking powder and salt. Make sure the ingredients are perfectly mixed.
- Pour in milk, beaten egg, and oil. Mix all the ingredients until smooth.
- Heat a frying pan with medium high heat.
- Add some butter or vegetable oil.
- Scoop the pancakes batter by using a ladle.
- Cook until it is brown on the both sides then put it in a plate.
- Continue till all the pancakes batter run out. Just remember to add more butter or vegetable oil.
- When all the pancakes are cooked, you can add some topping. I myself prefer chocolate syrup as the topping.
Dari procedure text di atas, goal-nya adalah How to Make Pancakes, atau cara membuat pancake. Untuk materials pembuatannya, dijelaskan di bagian ingredients, dan langkah membuatnya dijelaskan secara lengkap di bagian steps.
5. Contoh Procedure Text How to Make Soup
How to Make a Vegetarian Carrot Soup

Gambar vegetarian carrot soup. (Sumber: abeautifulplate.com)
Ingredients:
- 1 chopped onion
- 50 gr chopped carrots
- 2 lt vegetable stock
- 100 gr low fat cheese
- Ground black pepper
Instructions:
- Put the onion and carrots into a large pan with the stock. Bring up to boil.
- Blend all the ingredients up to a puree until smooth.
- Add soft cheese and blend again for creaminess.
- Serve with a cup of rice or preferred carbs, and enjoy.
(Sumber: freepik.com)
Dalam procedure text di atas, goals terletak pada judul teks, yaitu “How to Make a Vegetarian Carrot Soup” atau cara membuat sup wortel vegetarian. Materials terdapat pada bagian “Ingredients”, dan steps terletak pada bagian “Instructions”.
6. Contoh Procedure Text How to Make Instant Noodle
How to Make Instant Noodle
Ingredients:
- One pack of instant noodle
- Water
Steps:
- Turn on the stove.
- Put the pan, fill it with 400cc of water, and boil the water.
- After the water is boiled, put in the noodle into the pan.
- Cook the noodle.
- After 3 minutes left, turn off the stove.
- Prepare a bowl, pour all the seasoning into a bowl.
- Then put in the noodle into bowl, mix with the seasoning, and stir well.
- If you want, you can add another garnish.
- Finally, your noodle is ready to be served.
(Sumber: aklcourse.blogspot.com)
Goals atau tujuan dari procedure text di atas adalah How to Make Instant Noodle, atau cara membuat mi instan. Untuk materials-nya bisa kamu lihat di bagian ingredients. Dan untuk langkah atau cara memasaknya, sudah dijelaskan di bagian steps.
7. Contoh Procedure Text How to Make Bread
How to Make a Banana Bread
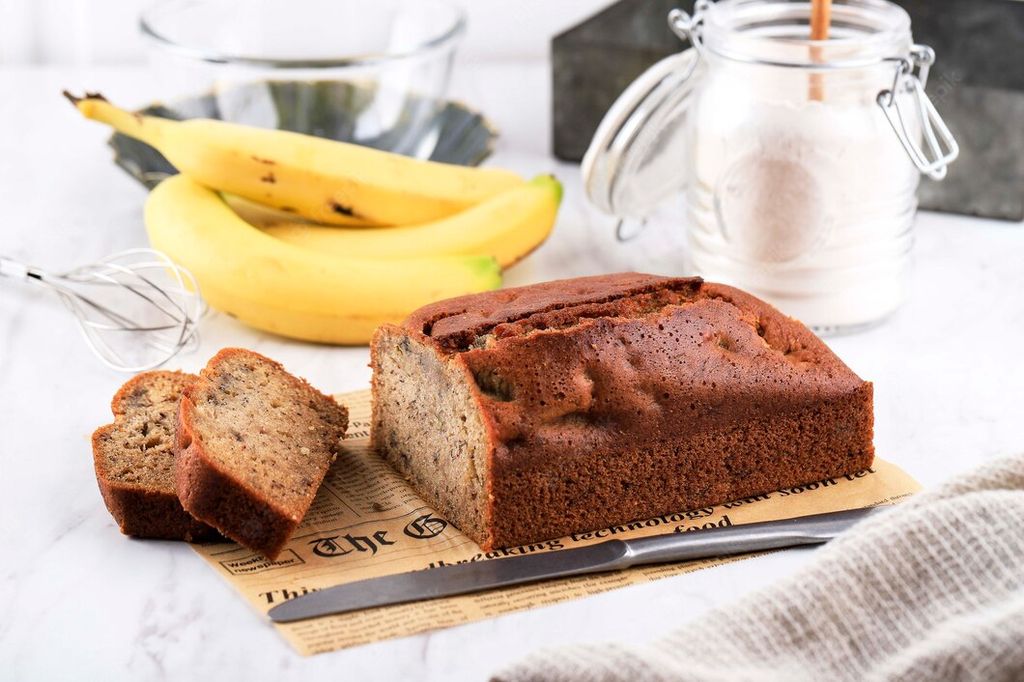
Gambar banana bread. (Sumber: freepik.com)
Dry Ingredients:
- 1 tsp of baking powder
- 1 tsp of baking soda
- 1 ½ cups of sugar
- 1 ½ cups of flour
- 3 ripe bananas
- Chocolate chips
Wet Ingredients:
- 125 gr of butter
- 2 eggs
- 1 tsp of vanilla essence
- ½ cup of natural yogurt
How to:
- Preheat oven to 180° C
- Mix wet ingredients
- Mix dry ingredients
- Pour the batter in a loaf tin
- Bake for 40 minutes
(Sumber: freepik.com)
Apabila dilihat dari contoh tersebut, goals terletak pada “How to Make a Banana Bread” karena teks ini menjelaskan cara untuk membuat banana bread (roti pisang). Sementara bagian materials terletak pada poin “Dry Ingredients” dan “Wet Ingredients”. Sementara steps terletak pada bagian “How to” yang menjelaskan beberapa langkah untuk membuat roti pisang.
Baca Juga: Contoh Ucapan Selamat (Congratulation) dalam Percakapan
8. Contoh Procedure Text How to Make Lemonade
How to Make a Lemonade
Ingredients:
- For each glass use:
- 2 tablespoons of lemon juice
- 2 tablespoons of sugar
- 1 glass of water
Methods:
- Slice a lemon in half and squeeze the juice into a cup.
- Take out the seeds.
- Pour 2 tablespoons into glass.
- Add sugar.
- Add water and stir well.
- Taste the lemonade. You may want to add more sugar or lemon to make it taste just right.
- Put it in ice cubes. A drop of red food coloring will make pink lemonade.
Goals dari contoh procedure text di atas yaitu “How to Make a Lemonade” atau cara membuat lemonade. Materials atau bahan yang dibutuhkan dijelaskan pada bagian “Ingredients”. Sedangkan langkah-langkahnya atau steps terletak pada bagian “Methods” yang terdiri atas 7 langkah.
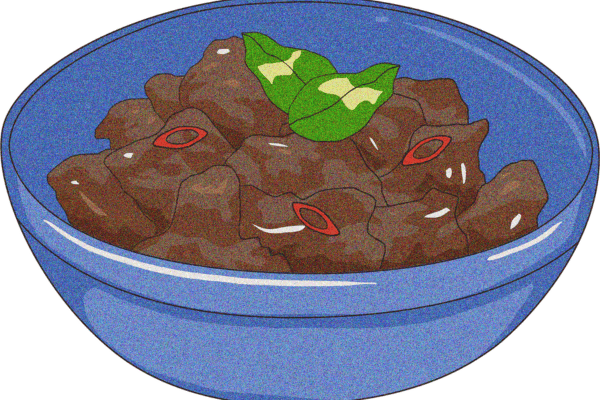
9. Contoh Procedure Text How to Make Beef Rendang
How to Make Beef Rendang
Ingredients:
For the Spice Paste:
- 1 large onion, roughly chopped
- 5 cloves of garlic
- 2 stalks of lemongrass, white part only, thinly sliced
- 1 thumb-sized piece of ginger, peeled and sliced
- 4-5 red chilies, seeds removed (adjust to your spice preference)
- 1 tablespoon ground coriander
- 1 tablespoon ground cumin
- 1 teaspoon ground turmeric
For the Rendang:
- 2 lbs (about 1 kg) beef, cut into bite-sized chunks (use a cut suitable for slow cooking, like beef chuck)
- 2 cans (400 ml each) coconut milk
- 2 kaffir lime leaves
- 2 turmeric leaves (optional, but they add a unique flavor)
- Salt, to taste
- Sugar, to taste
Instructions:
- Prepare the Spice Paste. In a blender or food processor, combine all the spice paste ingredients. Blend until you get a smooth paste.
- Cook the Spice Paste. In a large, heavy-bottomed pot or wok, heat a couple of tablespoons of oil over medium heat. Add the spice paste and cook, stirring frequently, until it becomes fragrant and the oil starts to separate.
- Add the beef chunks to the spice paste. Stir and cook until the beef is browned on all sides.
- Pour in the coconut milk, stirring well to combine with the beef and spice mixture.
- Add kaffir lime leaves and turmeric leaves (if using). Bring the mixture to a boil, then reduce the heat to low. Allow it to simmer uncovered. Stir occasionally to prevent sticking.
- Continue to cook on low heat, stirring occasionally. The goal is to let the coconut milk reduce and thicken while the beef slowly cooks and absorbs the flavors. This process can take 2-3 hours or more for the beef to become tender.
- Season with salt and sugar to taste. Adjust the seasoning according to your preference.
- Keep simmering until the coconut milk becomes a thick, rich sauce, and the beef is fork-tender. Be patient; slow cooking is key to achieving the best rendang.
- Once the rendang has thickened, the beef is tender, and the sauce has darkened and caramelized, remove it from heat.
- Serve the Beef Rendang with steamed rice or your favorite side dishes. It’s often enjoyed with traditional Indonesian accompaniments like ketupat (compressed rice cakes) or nasi lemak.
Goals dari procedure text di atas membahas tentang cara membuat rendang daging. Kalau dilihat, bahan yang digunakan memang agak banyak dan prosedur masaknya juga agak ribet yah, guys. Tapi, hal tersebut sepadan dengan rasa rendang yang enak. Apalagi masakan khas Pariaman ini terkenal sebagai salah satu makanan paling enak di dunia!
10. Contoh Procedure Text How to Make Peanut Butter and Jelly Sandwich
How to Make Peanut Butter and Jelly Sandwich
Ingredients:
- 2 slices of bread
- Peanut butter
- Jelly or jam of your choice
Equipment:
- Butter knife
- Plate
Procedure:
- Make sure you have all the necessary ingredients and equipment listed above.
- Place the bread on a plate. Take two slices of bread and place them on a clean plate.
- Spread peanut butter on one slice. Using a butter knife, scoop out a generous amount of peanut butter and spread it evenly on one of the slices of bread.
- Similarly, take the second slice of bread and spread your favorite jelly or jam evenly on it.
- Press the peanut butter-covered slice and the jelly-covered slice together, creating a sandwich. Make sure the peanut butter and jelly sides are facing each other.
- If you prefer, you can use the butter knife to cut the sandwich into halves or quarters.
- Your delicious sandwich is now ready to be enjoyed! You can eat it as is or pair it with your favorite beverage.
Contoh teks prosedur di atas membahas tentang membuat roti lapis selai kacang dengan tambahan olesan selai. Kamu bisa mengetahuinya dari judul, yaitu How to Make Peanut Butter and Jelly Sandwich. Kamu juga bisa mengecek bahan dan peralatan yang digunakan di bagian ingridients dan equipment, serta cara membuatnya di bagian procedure.
Baca Juga: Rumus Present Continuous Tense dan Fungsinya
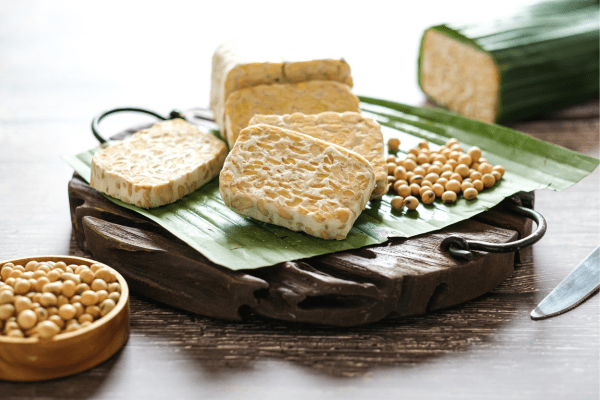
11. Contoh Procedure Text How to Make Tempe
How to Make Tempe
Ingredients:
- 2 cups whole soybeans
- 1/2 teaspoon tempeh starter culture (Rhizopus oligosporus)
- 1 tablespoon white rice flour or all-purpose flour
Equipment:
- Mixing bowl
- Clean cloth or paper towels
- Perforated plastic sheets or banana leaves
- Cooking thermometer
- Incubator (oven with light on, food dehydrator, or other warm, dark place)
Procedure:
- Rinse the soybeans thoroughly and soak them in water for about 8 to 12 hours or overnight.
- After soaking, rub the soybeans between your hands to remove the outer skins. Discard the skins and keep the peeled soybeans.
- Boil the soybeans in a large pot with enough water for about 20-30 minutes until they are tender but not mushy. Drain the cooked soybeans.
- Allow the cooked soybeans to cool to room temperature.
- In a mixing bowl, mix the cooled soybeans with the tempeh starter, ensuring they are well-coated.
- Sprinkle the flour over the soybeans and mix again. The flour helps the mold grow and bind the soybeans together.
- Divide the mixture into ziplock bags or wrap it in banana leaves. Flatten the mixture to about 1 inch thick.
- Using a fork or skewer, poke small holes into the mixture to allow air circulation.
- Place the bags or wrapped tempeh in a warm, dark place with a temperature between 85-90°F (29-32°C). This is the incubation period, and it typically takes about 24 to 48 hours.
- After the incubation period, check for the development of a white mycelium (mold) on the tempeh. The beans should be bound together with a firm, white layer.
- Once the tempeh is fully covered with mycelium, it is ready to use. Cut it into desired shapes and cook it in various recipes.
Goal dari teks prosedur di atas adalah membuat tempe, sesuai dengan judul yang tertera, yaitu How to Make Tempe. Kamu juga bisa mengecek bahan dan peralatan yang digunakan di bagian ingridients dan equipment, serta cara membuatnya di bagian procedure.
12. Contoh Procedure Text How to Make Salty Egg
How to Make Salty Egg
Ingredients:
- Duck eggs or chicken eggs
- Coarse sea salt
- Water
Equipment:
- A clean, dry container with a lid (large enough to hold all the eggs)
- Muslin cloth or cheesecloth
- String or rubber bands
Procedure:
- Choose fresh duck eggs or chicken eggs. Duck eggs are commonly used for salted eggs due to their larger size and thicker shells.
- Wash the eggs thoroughly with water to remove any dirt or debris. Pat them dry with a clean cloth.
- In a large bowl, mix coarse sea salt with water. The ratio is usually about 1 part salt to 2 parts water, but you can adjust it based on personal preference.
- Gently place the eggs into the brine, making sure they are completely submerged. If the eggs float, you can place a clean weight on top to keep them submerged.
- Allow the eggs to soak in the brine for about 2 to 3 weeks. This period of time allows the salt to penetrate the eggshells and preserve the eggs.
- Periodically check the eggs to ensure they are still submerged and to monitor the progress of the salting. You can gently shake the container to distribute the salt.
- If you prefer, you can individually wrap each egg in muslin cloth or cheesecloth and secure it with string or rubber bands. This step is optional but can help prevent the eggs from sticking together.
- After the soaking period, carefully remove the eggs from the brine. Rinse them thoroughly under running water to remove excess salt. Pat them dry with a clean cloth.
- Place the salted eggs in a cool, dry place or in the refrigerator. They can be stored for several weeks.
- Once your salted eggs are ready, you can use them in various recipes, such as salted egg custard, fried rice, or other dishes that benefit from their unique flavor.
Goal dari teks prosedur di atas adalah membuat telur asin, sesuai dengan judul yang tertera, yaitu How to Make Salty Egg. Pada metode pembuatan telur asin di atas, disebutkan kamu bisa menggunakan metode perendaman dengan air asin. Meskipun, pada praktiknya, ada juga telur asin yang dibuat dengan menggunakan batu bata maupun abu gosok.
Baca Juga: Contoh Kalimat Expression of Wish and Hope
13. Contoh Procedure Text How to Make Infused Water
How to Make Infused Water
Ingredients:
- Fresh fruits (e.g., berries, citrus slices, watermelon)
- Fresh herbs (e.g., mint, basil)
- Ice cubes (optional)
- Water
Equipment:
- Pitcher
- Wooden spoon or muddler
- Strainer or infuser bottle (optional)
Procedure:
- Make sure you have all the fresh fruits, herbs, and equipment listed above.
- Wash the fruits and herbs thoroughly. Cut larger fruits into slices or chunks, and bruise the herbs slightly to release their flavors.
- Place the prepared fruits and herbs into the pitcher. Feel free to get creative with combinations, such as strawberry and mint or cucumber and lime.
- If you want a more intense flavor, use a wooden spoon or muddler to gently press and twist the fruits and herbs in the pitcher. This helps release their natural juices and flavors.
- Pour cold water into the pitcher, covering the fruits and herbs completely. You can use tap water, filtered water, or sparkling water for a fizzy variation.
- Use a wooden spoon to give the ingredients a gentle stir. Place the pitcher in the refrigerator and let it chill for at least 1-2 hours to allow the flavors to infuse.
- If you prefer a clear drink, use a strainer to remove the fruits and herbs when serving. Alternatively, you can leave them in the pitcher for a more visually appealing presentation.
- Before serving, you can add ice cubes to the infused water for a refreshing touch.
- Pour a glass of the infused water and savor the refreshing and natural flavors. You can also garnish with a fresh slice of fruit or herb for a decorative touch.
Goal dari teks prosedur di atas adalah membuat infused water. Selain bahan-bahan yang direkomendasikan dalam ingridients, kamu juga bisa menggunakan buah-buahan lain yang kamu suka. Misalnya seperti apel, lemon, kurma, atau rempah seperti kayu manis. Kamu bisa mengikuti langkah-langkah pembuatannya seperti yang tercantum dalam procedures.
14. Contoh Procedure Text How to Make Oat Mask
How to Make a Natural Oat Mask
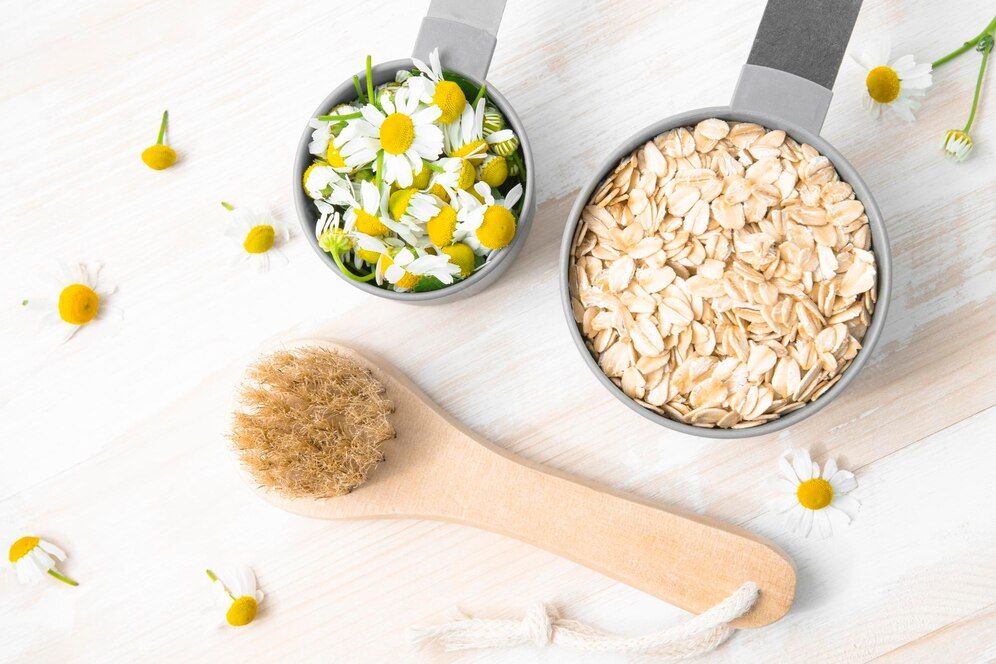
Gambar natural oat mask (Sumber: freepik.com)
Ingredients:
- Cooked (not dry) oatmeal
- Plain yogurt
- Honey
Recipe:
- In a mixing bowl, combine ½ cup boiling water and ⅓ cup oatmeal.
- Stir to make sure the water permeates the oatmeal.
- Let the mixture sit for two minutes.
- Measure in 2 tablespoons plain yogurt, 2 tablespoons honey, and 1 egg white.
- Stir well and use.
(Sumber: ppmapartments.com)
Contoh procedure text di atas membahas tentang cara membuat masker wajah natural dari oat. Hal tersebut bisa diketahui dari goals, yang terletak pada judul “How to Make Natural Oat Mask”. Bahan-bahan yang dibutuhkan atau materials berada pada bagian “Ingredients”. Sementara cara membuatnya atau steps terletak pada bagian “Recipe”.
15. Contoh Procedure Text Growing Green Beans From Seeds
Growing Green Beans From Seeds
Objective: To observe the germination and early growth stages of green beans.
Materials:
- Green bean seeds
- Small pots or containers
- Potting soil
- Watering can or spray bottle
- Sunlight or a grow light
Procedure:
- Fill small pots or containers with potting soil, leaving about an inch from the top.
- Plant one or two green bean seeds in each pot, pushing them about an inch deep into the soil. Cover the seeds with a thin layer of soil.
- Use a watering can or spray bottle to moisten the soil thoroughly. Ensure that the soil is evenly damp but not waterlogged.
- Green beans thrive in sunlight. Place the pots in a sunny windowsill or, if available, under a grow light. Ensure they receive at least 6 hours of sunlight per day.
- Keep the soil consistently moist but not saturated. Water the pots whenever the top inch of soil feels dry.
- As the days pass, you should start to see the green bean seeds germinate, with small shoots emerging from the soil.
- Use a notebook or create a chart to document the growth of the green beans. Note the date of germination, the appearance of leaves, and any noticeable changes.
- If the plants outgrow their pots, you can transplant them to larger containers or directly into a garden if the weather is suitable.
- Provide ongoing care by watering as needed and ensuring the plants receive adequate sunlight.
- Watch as the green bean plants grow larger, develop more leaves, and eventually produce flowers and beans.
Explanation: This experiment allows you to witness the fascinating process of plant germination and early growth. It also provides insights into the basic requirements for growing plants, such as soil, water, and sunlight.
Tujuan dari pembuatan teks prosedur di atas adalah tentang bagaimana menanam kacang hijau, seperti yang tertera di judulnya Growing Green Beans From Seeds. Kamu juga bisa mengecek bahan-bahan yang dibutuhkan di materials, serta tahapan penanaman kacang hijaunya dalam procedures.
16. Contoh Procedure Text The Color-Changing Milk Experiment
The Color-Changing Milk Experiment
Objective: To demonstrate the effects of dish soap on the surface tension of milk and observe the resulting color patterns.
Materials:
- Whole milk (enough to fill a shallow dish)
- Food coloring (multiple colors)
- Dish soap
- Cotton swabs or cotton balls
- Shallow dish or plate
Procedure:
- Pour enough whole milk into a shallow dish or plate to cover the bottom with a thin layer.
- Place several drops of different colored food coloring randomly on the surface of the milk. Ensure that the drops are spaced out.
- Dip one end of a cotton swab or cotton ball into dish soap, making sure to get a small amount on the tip.
- Gently touch the tip of the soapy cotton swab to one of the food coloring drops on the surface of the milk. Observe and record any changes that occur.
- Use a new cotton swab for each color, repeating the process of touching the food coloring drops with the soapy cotton swab. Note any differences in the reactions.
- Watch as the colors move and mix on the surface of the milk. Observe any patterns or changes in color. Record your observations.
Explanation: This experiment demonstrates the effects of dish soap on the surface tension of milk. The soap disrupts the fat molecules in the milk, causing them to move and create colorful patterns as the food coloring spreads. The experiment provides a visual representation of how substances interact at a molecular level.
Tujuan dari eksperimen ini dapat kamu temukan dalam judul dan objective, yaitu eksperimen tentang perubahan warna pada susu. Kamu juga bisa melihat penjelasan lengkapnya pada bagian explanation.
17. Contoh Procedure Text How to Make Slime
How to Make a Fluffy Slime
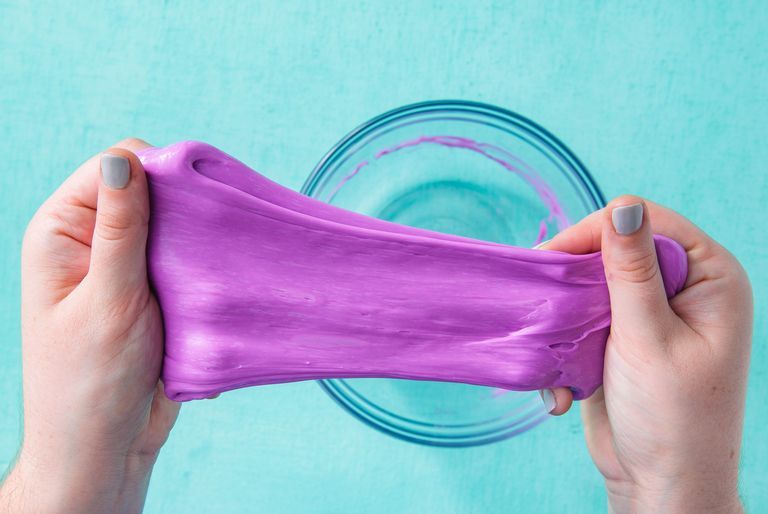
Gambar a fluffy slime. (Sumber: delish.com)
What you need:
- 100ml PVA white glue (children’s craft glue or CE marked glue)
- ½ tsp bicarbonate of soda
- gel food coloring
- 1 tsp contact lens cleaning solution
- glitter (optional)
How to make:
- Squeeze the glue into a mixing bowl (look for a bottle in a 100ml size if possible so you won’t have to measure it out).
- Add the bicarbonate of soda and mix well.
- Add a drop or two of your chosen gel food coloring. Less coloring gives a pastel color; the more you add, the brighter the color.
- Mix until well incorporated.
- Add the contact lens solution and mix. The slime will begin to form, going stringy before coming away clean from the bowl into a ball.
- Once it has formed, take it out and knead it with your hands. It will be sticky at first but after about 30 seconds you’ll have a smooth and pliable ball.
- Add glitter at this point, if desired, and work in with your hands.
- Store in a pot with a lid.
(Sumber: www.bbcgoodfood.com)
Tujuan atau goals dari contoh procedure text di atas yaitu “How to Make a Fluffy Slime” atau cara membuat slime yang empuk. Materials atau bahan yang dibutuhkan dijelaskan pada bagian “What you need”. Sedangkan langkah-langkahnya atau steps terletak pada bagian “How to make” yang terdiri atas 8 langkah.
Baca Juga: Pahami Pengertian Advertisement, Aspek, Jenis & Contohnya
18. Contoh Procedure Text Investigating Buoyancy with a Floating Egg
Investigating Buoyancy with a Floating Egg
Objective: To understand the concept of buoyancy and determine the factors that affect whether an egg will float or sink in water.
Materials:
- Raw eggs (at least three)
- Water
- Salt
- Tablespoon
- Bowl or clear container
- Marker or pen
Procedure:
- Collect all the materials needed for the experiment.
- Fill the bowl or clear container with water, leaving enough space to submerge the eggs.
- Place a raw egg gently in the water and observe whether it sinks or floats. Note your observations.
- If the egg floats, use the marker or pen to mark the water level on the container.
- Take the egg out of the water, dry it, and set it aside.
- Add salt to the water, one tablespoon at a time, stirring until each tablespoon is fully dissolved. Continue this process until the water is saturated and no more salt dissolves. This creates a saltwater solution.
- Gently place the egg back into the water, which now contains the dissolved salt. Observe whether the egg sinks or floats. Note your observations.
- If the egg floats in the saltwater, mark the new water level on the container.
- Repeat the process with additional eggs. You can use eggs of different sizes or from different sources to see if the results vary.
- Compare the results and water levels for each egg. Analyze whether the eggs float or sink and whether the addition of salt affects their buoyancy.
Analysis:
- Eggs float in saltwater because the increased density of the saltwater makes it easier for objects (like the egg) to float.
- The experiment demonstrates the concept of buoyancy and how changing the density of the surrounding fluid affects the ability of an object (in this case, an egg) to float.
Variables to Consider:
- Independent Variable: The concentration of salt in the water.
- Dependent Variable: Whether the egg floats or sinks.
- Controlled Variables: The type and size of eggs, water temperature, and the size of the container.
Tujuan prosedur teks di atas adalah ingin menyelidiki daya apung pada floating egg atau telur yang mengambang. Hal tersebut tercantum dalam judul, yaitu Investigating Buoyancy with a Floating Egg. Nah, kamu bisa mengikuti langkah-langkahnya dalam procedure, serta mengetahui analisis dan penjelasan lengkap terkait eksperimen ini dalam analysis dan variables to consider.
19. Contoh Procedure Text How to Clean a Washing Machines
How to Clean a Washing Machines
Materials:
- White vinegar or baking soda
- Microfiber cloth or sponge
- Old toothbrush
- Dish soap
- Clean, dry cloth or towel
Procedure:
- Check the manufacturer’s instructions. Before you start cleaning, check your washing machine’s manual for any specific cleaning instructions provided by the manufacturer.
- Wipe down the exterior of the washing machine with a damp microfiber cloth or sponge. If there are stubborn stains, mix a solution of water and a small amount of dish soap to clean the surfaces.
- Run an empty cycle with hot water to clean the drum. Add either 1 cup of white vinegar or 1/2 cup of baking soda to the detergent dispenser. This helps remove any detergent residue, mold, and mildew.
- Clean the Dispensers and Seals:
a. Remove the detergent, fabric softener, and bleach dispensers (if applicable) from the machine.
b. Soak them in a solution of equal parts water and white vinegar for about 15-20 minutes. Scrub any remaining residue with an old toothbrush.
c. Wipe the rubber seals around the door with a vinegar-soaked cloth to remove any mold or mildew. - Clean the Filter (if applicable):
a. Check your washing machine for a lint filter or debris trap. If present, consult your manual on how to remove and clean it.
b. Rinse the filter under running water and remove any accumulated lint or debris. - Clean the Drain Pump (if applicable):
Some washing machines have a drain pump filter that may need cleaning. Refer to your manual for instructions on how to access and clean it. - To remove any remaining residue and odors, run a maintenance wash. You can do this by running an empty hot water cycle with 1 cup of white vinegar or 1/2 cup of baking soda.
- After completing the cleaning cycles, leave the washing machine door open for a while to allow the drum to air out and prevent the growth of mold or mildew.
- Once the interior is cleaned, wipe down the exterior of the machine with a clean, dry cloth.
- Regular Maintenance:
a. To prevent future buildup, leave the door open after each wash to allow the drum to dry.
b. Clean the dispensers and wipe the rubber seals regularly.
c. Perform a maintenance wash with vinegar or baking soda every few months.
Tujuan dari procedure text di atas adalah untuk mengetahui cara membersihkan mesin cuci, sesuai dengan judulnya yaitu How to Clean a Washing Machines. Untuk perlengkapan yang dibutuhkan tertera di bagian materials, sedangkan untuk tahapan cara memberihkannya ada di bagian procedure.
Baca Juga: Cara membuat Advertisement
20. Contoh Procedure Text How to Use Chopsticks
How to Use Chopsticks

Gambar chopsticks. (Sumber: unsplash.com)
- Place the first chopstick between the pointer finger and thumb; balance it on the ring finger.
- Place the second chopstick between the pointer finger and thumb; rest it on the middle finger.
- Use your thumb, pointer and middle fingers to grasp the second chopstick firmly.
- Index and middle fingers do the lifting.
- Use index and middle fingers to close chopsticks over food.
(Sumber: livejapan.com)
Tujuan atau goals dari contoh di atas yaitu “How to Use Chopsticks” atau menjelaskan cara menggunakan sumpit. Nah, pada contoh tersebut, kita tidak bisa menemukan materials atau bahan-bahan yang dibutuhkan. Kok bisa?
Karena procedure text tersebut menjelaskan mengenai instruksi menggunakan sesuatu, bukan cara membuat sesuatu. Dalam procedure text di atas, pembahasan langsung masuk pada steps atau tutorial menggunakan sumpit yang terdiri atas 5 langkah.
21. Contoh Procedure Text How to Use Camera
How to Use Camera

Materials you need:
- A digital camera DSLR or pocket camera or the others camera that you have.
- The object. You can find something that interesting like buildings, human, animals, plants, or the others.
Steps:
- Handle the camera and turn on it.
- Center the object in the LCD and manage the z00m. Control until you get the best view.
- When you are ready to take the picture, hold the shutter speed and various other calculations.
- Then, a light should appear that let you know the camera is set to go.
- After that, press shutter all the way down.
(Sumber: issu.com)
Contoh prosedure text di atas bertujuan untuk menunjukkan cara menggunakan kamera. Dijelaskan juga meterials apa saja yang dibutuhkan, dan step by step cara penggunaannya.
22. Contoh Procedure Text How to Use Printer
How to Use Printer
Materials you need:
- A printer
- Some papers
- A laptop
Steps:
- Plug in the power cable of the printer and turn it on.
- Go to your laptop/computer and find the “printer setting”.
- Click “Add a printer” and follow the further instructions that appear.
- It is ready to use.
Tujuan atau goal procedure text di atas adalah How to Use Printer, atau cara menggunakan printer. Untuk materials yang dibutuhkan, terdiri dari printer, kertas, dan laptop. Dijelaskan juga cara atau langkah penggunaannya dalam bagian steps.
23. Contoh Procedure Text How to Use a Blender
How to Use a Blender
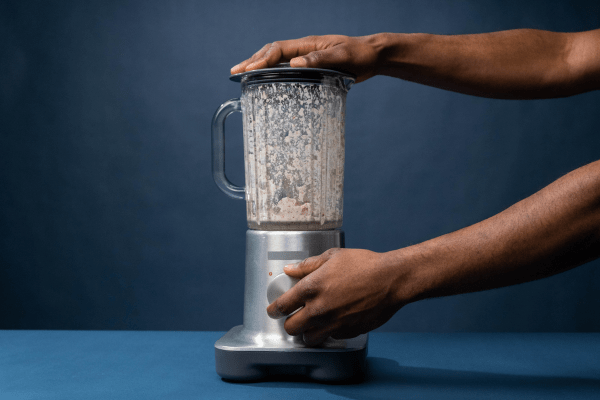
Materials you need:
- A blender
- Some fruits, vegetables, ice, milk, or any kind of food and drinks.
Steps:
- Cut the ingredients into smaller pieces if the ingredients were solid and big.
- Prepare the blender jar, make sure to clean it before we use it and put the blender blades on the bottom of the jar.
- Place the blender jar on the blender machine.
- Insert the plug into the electricity socket.
- Put all of the ingredients into the blender jar.
- Add some water to help the blender mix the ingredients evenly.
- Close the lid and cover the blender jar tightly.
- Start the blender by pressing the speed button, you can start from the medium speed.
- Wait until we get the right texture of the mixture, we can adjust the speed and also add some more water if necessary.
- Open the blender and pour the mixture into a glass or bowl.
- After the usage, don’t forget to clean the blender jar, lid, and blades.
(Sumber: kampunginggris.online)
Tujuan dari teks prosedur di atas, bisa dilihat dari judulnya yang menjelaskan tentang How to Use a Blender, atau cara menggunakan blender. Materials yang dibutuhkan ada blender dan juga beberapa bahan makanan dan minuman. Untuk langkah penggunaannya, dijelaskan secara berurut di bagian steps.
24. Contoh Procedure Text How to Operate The Computer
How to Operate The Computer
Materials you need:
A computer and a set of computer devices.
Steps:
How to operate the computer consists of three stages, they are how to turn on the computer, how to operate the computer itself, and how to turn off the computer.
1. How to Turn On The Computer
Before turning on the computer, there are several things to be aware of to make sure devices such as keyboard, mouse, monitor and a power cable in a state of connected to the power supply and make sure the PC is installed the Operating System. Here are the steps to turn on the computer:
- Press the power button on the CPU.
- Push of a power button on the monitor.
- Wait a few moments until the loading process window pops up windows and computer/PC is ready for use.
2. How to Operate The Computer
After the computer restarts, the next process is to Operate Computers. So that you can more quickly master the computer, then use the computer according to your needs and goals.
For the example, if you want to typing, sending e-mail, making letters, and other activities which support your work at school, then Microsoft office (Microsoft Word, Excel, Power Point, Access) and little knowledge of the internet has a very quality to help you lighten your work.
3. How to Turn Off The Computer
To turn off the computer (Shutdown), there are several steps that must be considered as belows:
- Close all the applications you use.
- Click the Start menu (XP) / Logo Windows (7) in the bottom left corner.
- Select Shutdown and wait a while until your computer is completely shutted down.
- After the computer completely off, then press the button on the monitor and speakers, stabilizer and other computer devices.
- After that, unplug it from the wall socket. Its aim is to save power and to anticipate the occurrence of electrical short circuit.
(Sumber: belajarbahasainggrisku.id)
Teks prosedur bahasa Inggris di atas, menjelaskan How to Operate Computer, atau cara mengoperasikan komputer. Ada 3 tahap untuk mengoperasikannya, yaitu cara menghidupkan komputer, cara menggunakan komputer itu sendiri, dan cara mematikan komputer. Ketiga tahapan tersebut dijelaskan secara rinci di bagian steps.
Baca Juga: Belajar Cara Membuat Procedure Text dari Minuman Viral
25. Contoh Procedure Text How to Using a Microwave
How to Using a Microwave
Step by step:
1. Place the food you want to heat or cook on a microwave-safe dish or container. Ensure that the dish is labeled as microwave-safe and doesn’t have any metallic parts, as metal can cause sparks and damage the microwave.
2. Cover the food with a microwave-safe cover, lid, or microwave-safe plastic wrap. Covering helps trap steam, promoting even cooking and preventing splatters.
3. Use the microwave’s control panel to set the cooking time. Most microwaves have a numerical keypad where you can enter the desired time. Alternatively, some microwaves have express or one-touch buttons for common cooking times.
4. Some microwaves allow you to adjust the power level. Use this feature if you want to cook at a lower power setting. For example, you might use a lower power level for defrosting or cooking delicate items.
5. Press the “Start” or “Microwave” button to begin the cooking process. The microwave will generate microwaves, which heat the food by causing water molecules within it to vibrate and produce heat.
6. Pausing and stirring (optional). If your microwave has a pause or stop button, you can use it to check or stir the food during cooking. This can help ensure even cooking, especially for larger or denser items.
7. When the microwave beeps to signal the end of the cooking time, carefully open the door and check if the food is done to your liking. If not, you can add more time and continue cooking.
8. Use oven mitts or a towel to protect your hands when removing hot dishes from the microwave. Steam can escape, so open the container away from your face.
Additional:
- Regularly clean the inside of the microwave to remove any food splatters or residue. Use a damp cloth or sponge, and avoid using abrasive cleaners.
- Microwaving different foods: Keep in mind that different foods may require different cooking times. Follow recommended guidelines for specific items, and consider using the microwave for reheating leftovers, defrosting, or cooking simple meals.
Teks prosedur bahasa Inggris di atas, menjelaskan How to Using Microwave, atau cara menggunakan microwave. Ada 8 tahap untuk menggunakannya, yang bisa kamu temukan dalam bagian step by step. Selain itu, ada juga tambahan tips untuk menjaga kebersihan microwave dan juga cara memanaskan jenis-jenis makanan yang berbeda di bagian additional.
Contoh Soal Procedure Text
Nah, setelah dijelaskan dengan beberapa contoh di atas, kalian sudah mengerti kan, guys, tentang procedure text? Supaya kamu lebih paham dengan penjelasan di atas, coba jawab contoh soal procedure text di bawah ini, yuk!
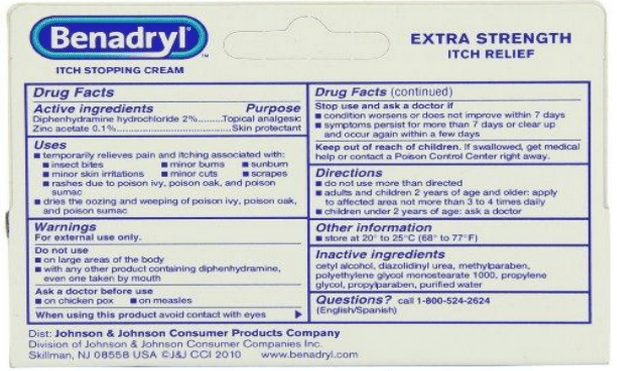
(Sumber: randalls.com)
From the picture above, you can use this cream on your body parts, except….
- Hands
- Legs
- Eyes
- Stomach
Jawaban: C
Pembahasan:
Dari gambar di atas, kamu bisa melihat pada bagian “warnings” terdapat kalimat “when using this product avoid contact with eyes.” Artinya kamu tidak boleh memakai obat ini pada bagian mata. Jadi, jawaban yang tepat itu C, ya.
Baca Juga: Pahami Pengertian Procedure Text, Struktur, Jenis & Contohnya, Yuk!
—
Gimana? Sudah lebih paham kan mengenai materi procedure text dalam bahasa Inggris setelah mengerjakan latihan soal? Jika masih ada yang belum kamu pahami atau mau berlatih soal lebih banyak lagi, kamu bisa tonton video belajar beranimasi atau mengerjakan soal di ruangbelajar. Yuk, coba download dan pelajari lebih banyak materi lainnya!

Referensi:
Food Republic. 2014. Indonesian Vegetable Salad With Peanut Sauce Recipe. Diakses dari https://www.foodrepublic.com/recipes/indonesian-vegetable-salad-with-peanut-sauce-recipe/ pada 4 Oktober 2022
Kerrigan, Emily. 2022. How to Make Slime. Diakses dari https://www.homesciencetools.com/article/how-to-make-slime/ pada 4 Oktober 2022
Live Japan. 2020. How to Hold Chopsticks: 5 Steps to Use Chopsticks Properly!. Diakses dari https://livejapan.com/en/article-a0000335/ pada 4 Oktober 2022
Ppmapartments. 2021. 4 DIY Oatmeal Face Masks to Give Your Skin a Boost. Diakses dari https://ppmapartments.com/diy-oatmeal-face-masks/ pada 4 Oktober 2022
Artikel ini telah diperbarui pada 7 November 2023, kemudian diperbarui lagi tanggal 8 Januari 2024.

Adya Rosyada Yonas
Bagikan artikel ini: